Getting Started 🚀
Private Server 🔒
To enhance privacy and control, you can host your own private server. This keeps all message data within your infrastructure while maintaining push notification capabilities through our public server at api.sms-gate.app. This setup eliminates the need to configure Firebase Cloud Messaging (FCM) or rebuild the Android app, but it does demand some technical know-how.
flowchart
    %% === MAIN BLOCKS ===
    Users["👥 Users"]
    Android["🤖 SMSGate App"]

    subgraph PrivateServer["Private Server"]
        GoServerPrivate["🐹 Server"]
        GoWorkerPrivate["🐹 Worker"]
        DB["🦭 DB"]

        GoServerPrivate <--> DB
        GoWorkerPrivate --> DB
    end

    subgraph Google["Google"]
        FCM["🔥 FCM"]
    end

    subgraph PublicServer["Public Server"]
        GoServerPublic["🐹 api.sms-gate.app"]
    end

    %% === CONNECTIONS ===

    Users -->|REST API| GoServerPrivate
    GoServerPrivate -->|notification| GoServerPublic
    GoServerPublic -->|notification| FCM
    FCM -->|PUSH| Android
    Android <--> GoServerPrivate

    %% === ALTERNATIVE NOTIFICATION PATH ===
    Android -.->|SSE| GoServerPrivate

    %% === STYLING ===
    classDef altConn stroke-dasharray: 5 5,stroke:#888,fill:none;
    class Android,GoServerPrivate,GoWorkerPrivate,DB altConn;
When to Choose Private Mode
- 🏢 Enterprise deployments requiring full data control
- 🔐 Enhanced security compliance needs
- 📈 Messaging rate exceeds Public Server limit
- 🌐 Custom integration requirements
Prerequisites ✅
The easiest way to run the server is to use Docker. For alternative installation methods, see Private Server Documentation.
To run the server, you'll need:
- 🐧 Linux VPS
- 🐳 Docker installed
- 🗄️ MySQL/MariaDB server with empty database and privileged user
- 🔄 Reverse proxy with valid SSL certificate (project CA supported)
Run the Server 🖥️
-
Create configuration
Copy the example config and customize:Get config.yml templateKey sections to edit:wget https://raw.githubusercontent.com/android-sms-gateway/server/master/configs/config.example.yml -O config.ymlPrivate Server Configuration Examplegateway: mode: private private_token: your-secure-token-here # (1)! http: listen: 0.0.0.0:3000 database: # (2)! host: localhost port: 3306 user: root password: root database: sms timezone: UTC- Must match device configuration
- Must match MySQL/MariaDB configuration
Configuration Location
By default, the application looks for
config.ymlin the current working directory. Alternatively, you can set theCONFIG_PATHenvironment variable to specify a custom path to the configuration file. -
Launch the server
-
Run the background worker (optional)
Docker Commanddocker run -d --name sms-gateway-worker \ -v $(pwd)/config.yml:/app/config.yml \ ghcr.io/android-sms-gateway/server:latest \ /app/app workerThe background worker handles maintenance tasks. See Background Worker for setup details.
-
Configure reverse proxy
Example Nginx Configlocation / { proxy_pass http://localhost:3000; proxy_set_header Host $host; proxy_set_header X-Forwarded-For $remote_addr; }See
Reverse Proxy Configurationfor setup details and advanced options.
Verification
Test server accessibility:
Configure Android App 📱
Important
Changing servers will reset credentials and require device re-registration!
-
Access Settings
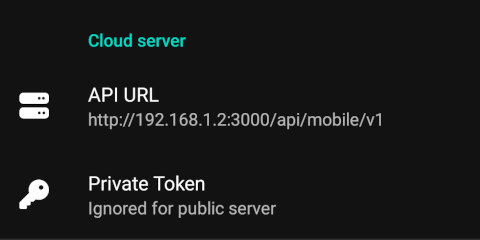
Navigate to Settings tab → Cloud Server -
Enter server details
-
Activate connection
- Switch to Home tab
- Activate Cloud server switch
- Restart the app using the bottom button
Successful Connection
New credentials will appear in Cloud Server section when configured properly:
Password Management 🔑
Identical to Cloud Server mode.